2026 is shaping up to be the year of the personal AI agent. Everyone’s building tools to manage your email, calendar, and messaging through natural language. I’m interested in building these integrations myself with Claude Code. I eventually want my own agent that runs on a schedule and handles things for me, and I’d rather understand how each piece works than depend on a framework.
In my previous post on Chrome DevTools MCP, I set up Claude Code to interact with authenticated websites like X and Gmail. I’ve been using it to build a daily newsletter that summarizes all my email subscriptions. It worked, but interacting with Gmail through a browser is slow: DOM scraping, clicking through the UI, waiting for pages to load. I use the gh CLI every day and it works because it’s simple: type a command, get structured output, pipe it somewhere. Using the Gmail API through a CLI would be way faster.
There are already Google Workspace MCPs and Gmail CLIs like gogcli out there, but I didn’t want to install someone else’s tool. I wanted to see what it takes to build the same thing for Gmail.
Key Takeaways
- A CLI beats browser automation: If an API exists, wrapping it in a CLI gives your agent faster, more reliable, structured access.
- Build it yourself: You don't need an existing library. Building your own tool teaches you how the pieces fit together, and you end up with something that works exactly how you want.
- Automate parts of your life with your agent: Setting up the Gmail CLI gave me a tool I use every day to summarize newsletters, clean my inbox, and triage email without opening Gmail.
Starting the Project
I opened Claude Code and started by creating a project and a GitHub repo:
make me a project for this in ~/code/me/gmail-cli. git init it, make me a private gh repoI prefer planning before building, something I wrote about in this post on AI collaboration. Instead of jumping straight into code, I asked Claude Code to research the Gmail API and create a plan.
research the Gmail API and write me a plan.md covering Google Cloud setup, OAuth configuration, CLI commands, and edge casesClaude Code produced a plan covering Google Cloud setup, OAuth configuration, scopes, rate limits, credential storage, and PKCE authentication. I reviewed it, asked clarifying questions (like the difference between External and Internal OAuth consent screen types), and asked Claude Code to make adjustments based on my feedback before any code got written. Having everything mapped out in plan.md meant Claude Code could build most of the CLI without stopping to research.
Setting Up Google Cloud
You’ll need to do this part yourself before Claude Code can build the CLI.
Create a Project and Enable the Gmail API
Go to the Google Cloud Console and create a new project. Name it “gmail-cli” or whatever you want. Navigate to APIs & Services > Library, search for “Gmail API”, and click Enable.
Configure the OAuth Consent Screen
OAuth is the only way to access Gmail programmatically. OAuth can seem intimidating, but configuring the consent screen is straightforward. Google Cloud Console organizes this into three sections: Branding, Audience, and Data Access. You can find all three under Google Auth platform in the sidebar (or under APIs & Services > OAuth consent screen if your console still uses the older layout).
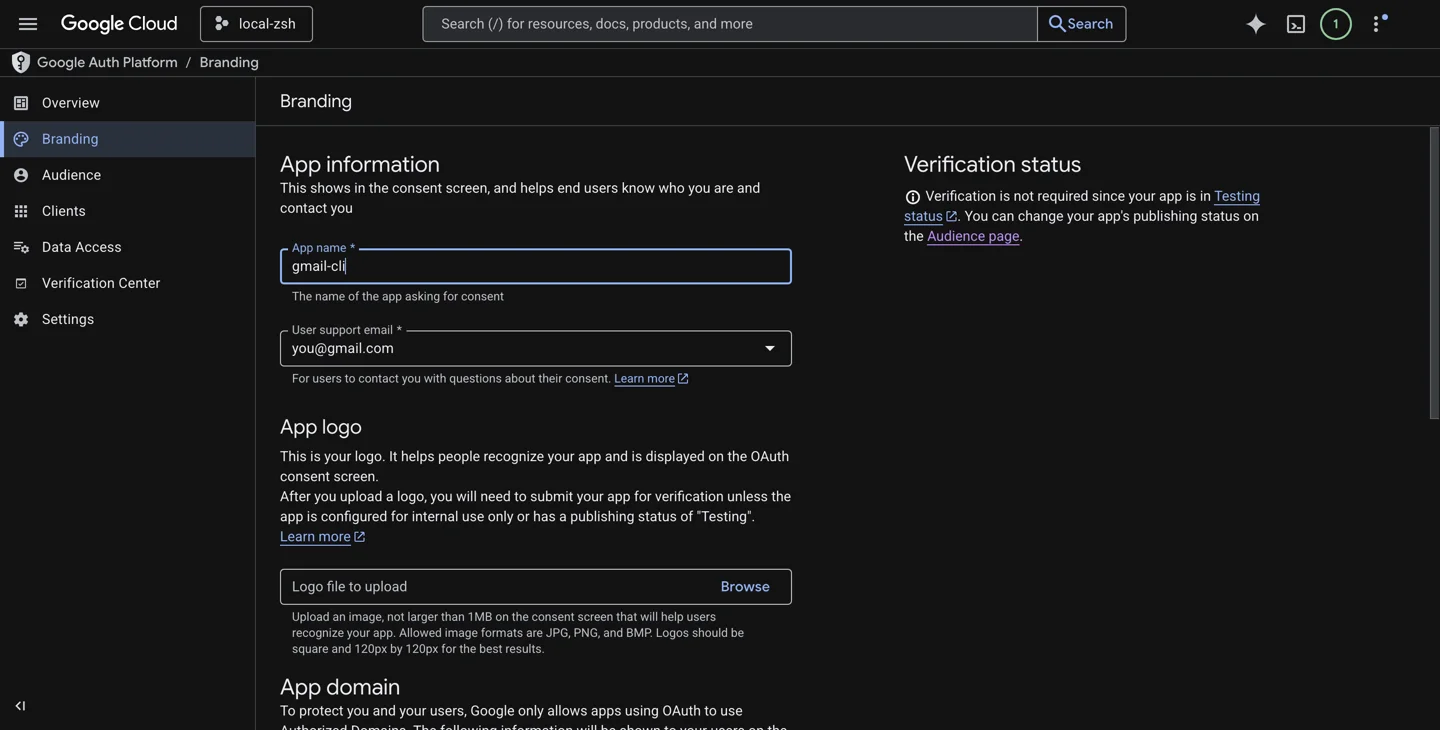
Branding: Go to Google Auth platform > Branding. Enter an app name (like “gmail-cli”), your email as the user support email, and your email again as the developer contact. Click Save.
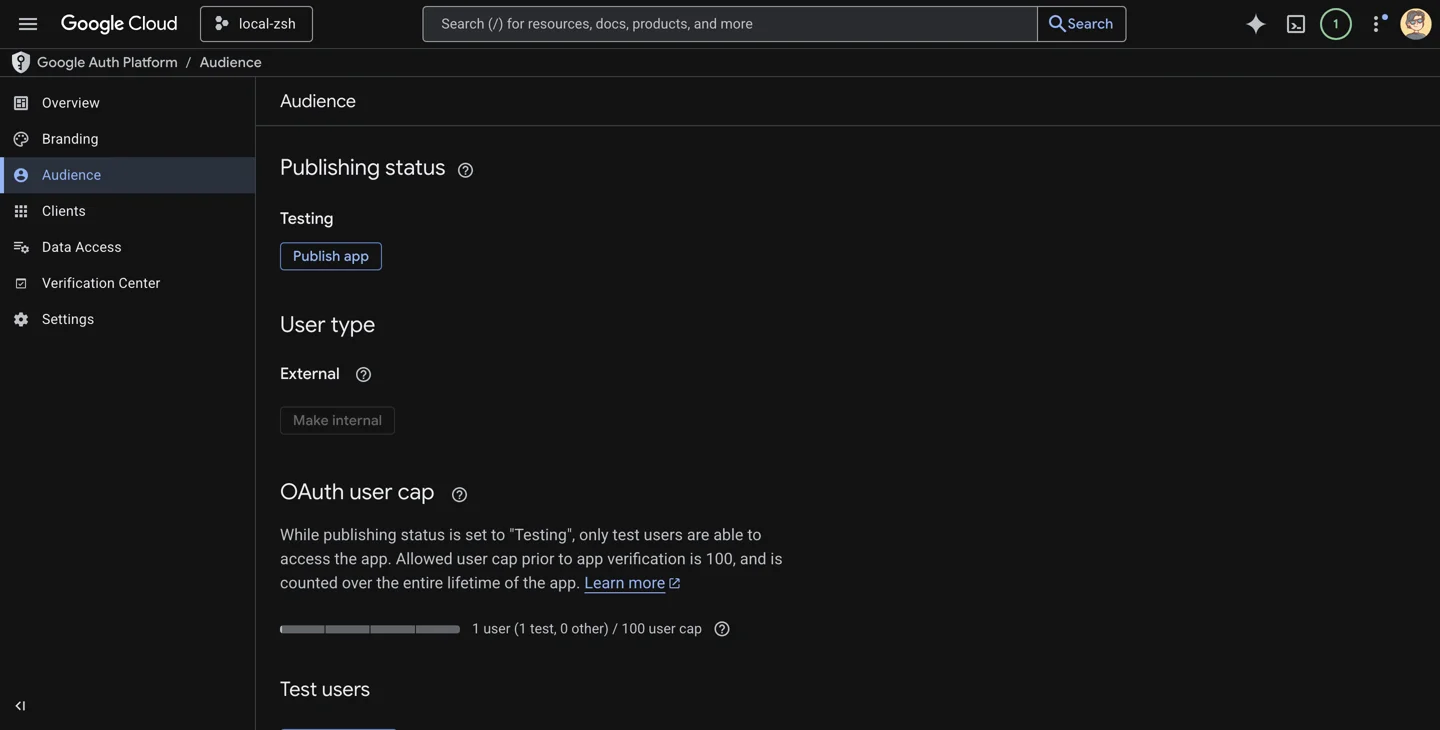
Audience: Go to Google Auth platform > Audience. Select External as the user type. This is the right choice unless you’re on a Google Workspace organization and want to restrict access to your org. Then add yourself as a test user: click Add users, enter your Gmail address, and save. While the app is in testing mode, only listed test users can authorize.
Data Access (Scopes): Go to Google Auth platform > Data Access. Click Add or Remove Scopes and add the permissions your CLI needs:
https://www.googleapis.com/auth/gmail.readonly(read emails)https://www.googleapis.com/auth/gmail.modify(archive, labels)https://www.googleapis.com/auth/gmail.send(send emails)
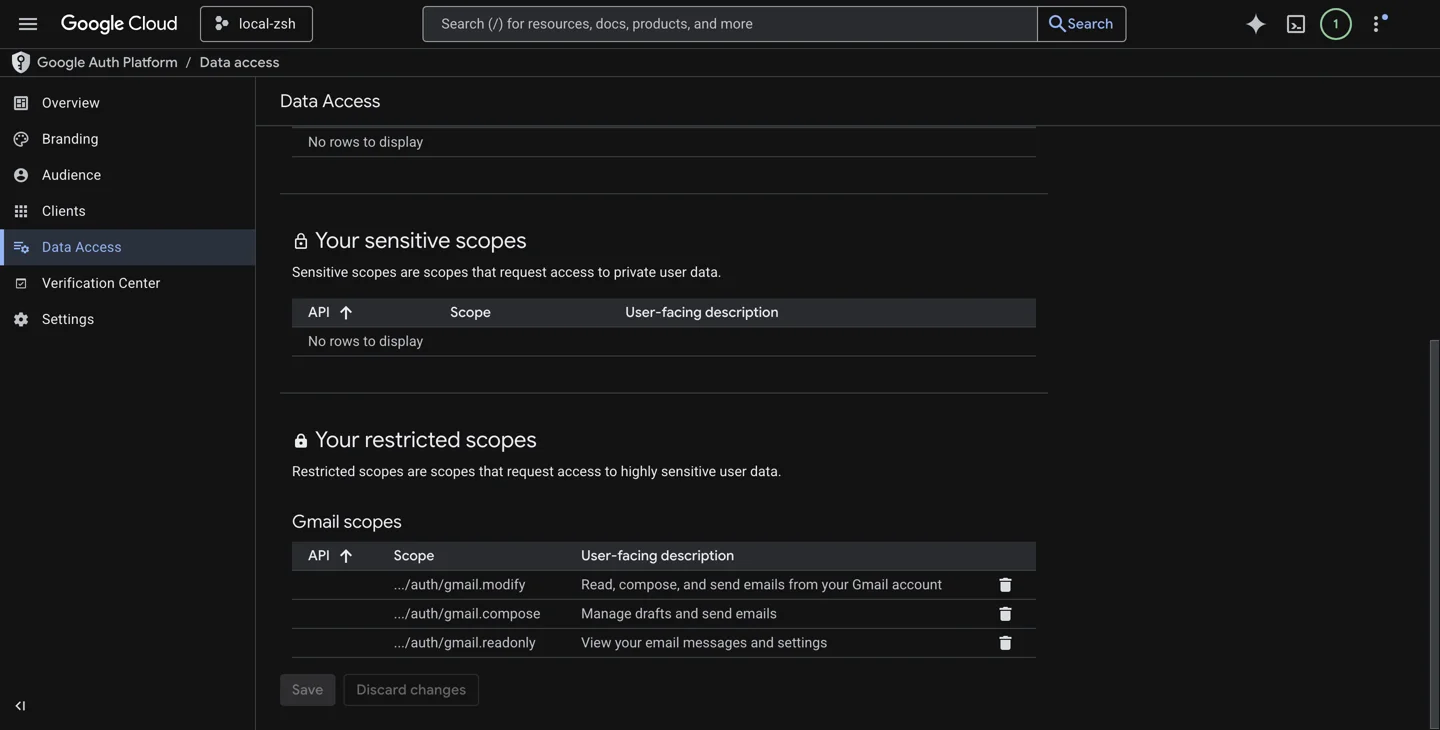
Scopes control what the CLI will be able to do with your account. Start with gmail.readonly if you only need to read. Add gmail.modify for archiving and label management. Add gmail.send only if you want to send emails. The narrower the scope, the less damage a leaked token can do.
One thing to know: apps in “Testing” mode have refresh tokens that expire every 7 days. If that gets annoying, you can go to the Audience page and click Publish App to get long-lived tokens. For a personal CLI, there’s no verification process required. Google shows an “unverified app” warning during authorization, but you can click through it. I’ve left mine in testing mode and it’s been fine.
Create OAuth Credentials
Now that permissions and scopes are configured, you can create the OAuth credentials. Go to Google Auth platform > Clients (or APIs & Services > Credentials), click Create client (or Create Credentials > OAuth client ID), and select Desktop app. Download the JSON file, save it as credentials.json, and drop it into your project directory. This is what the CLI uses to authenticate. Add both credentials.json and token.json (created after the first login) to .gitignore.

Building the CLI With Claude Code
With the Google Cloud setup done and credentials.json in the project, I asked Claude Code to implement plan.md:
implement the plan. I've done all the Google Cloud setup and dropped credentials.json into the projectClaude Code read the spec, wrote package.json and index.js, ran npm install, and made the file executable. The initial build had inbox, search, read, labels, and help.
To use gmail-cli as a command from anywhere on your system, tell Claude Code to set that up using npm link. This creates a global symlink from your system’s PATH to the project’s executable, so you can type gmail-cli in any terminal window instead of running node /path/to/project/index.js every time. If you’re building your own CLI, this is worth doing early.
Testing the Auth Flow
Before using the CLI with Claude, I ran it manually to make sure the OAuth flow worked:
gmail-cli inbox --limit 1The first time you run any command, the CLI opens your browser for OAuth authorization. You approve the permissions, the browser redirects back, and the CLI saves a token.json for future use. After that, every command authenticates automatically.
First Use With Claude
With auth working, I asked Claude to try it out:
ok let's try this out, read my last 10 emails, write me a summaryClaude Code ran the CLI and summarized my inbox. An Amex notification, a LinkedIn job listing, some newsletters, and a recruiting email from a name I didn’t recognize.
I asked Claude Code to tell me about that email. It was a recruiting message from a startup looking for a founding engineer. They’d found me through my React Native work. From there I kept going, using the CLI to read and triage the rest of my inbox.
Adding More Features to the CLI
Everything beyond the initial five commands got added because I needed it during actual use.
JSON Output and Body Inclusion
I had a newsletter skill set up that used Chrome DevTools MCP to open Gmail, navigate to each newsletter, and extract the content. I wanted to replace the browser automation with the CLI, but it needed to return structured data.
I asked Claude Code to make the CLI return structured data. It added --json output, --body to include message content, and --max-length for truncation. When I pointed Claude Code at the newsletter skill to replace Chrome MCP with the CLI, it also added batch-read for fetching multiple emails in parallel and a send command for forwarding the compiled newsletter. The workflow went from 60+ seconds of browser automation to about 5 seconds of API calls.
The Archive Command
During an email triage session, I asked Claude Code to archive my Uber Eats emails. The CLI didn’t have an archive command yet.
add an archive command to the CLI and use it to archive all my uber eats emailsClaude Code wrote the function, added it to the command switch, and archived the emails in the same turn.
Discovering batchModify
The archive command initially processed messages one at a time. That worked fine for a handful of emails. Then I asked Claude Code to archive all my LinkedIn emails.
It archived 100. Checked again, found 100 more. Archived those. Still more. I asked:
how could we do this more efficiently? does the gmail api have other features that we're not using?Claude Code searched the Gmail API docs and found batchModify, an endpoint that modifies up to 1,000 messages in a single call. It rewrote the archive command with a --search flag (so you don’t need to pre-fetch message IDs) and batchModify for the actual operation.
gmail-cli archive --search "from:linkedin.com" archived 2,191 emails in one shot.
Top Senders and Rate Limits
After several rounds of targeted archiving, I still had about 15,000 emails. I needed to know which senders were flooding my inbox:
so I have about 14,835 emails in my inbox. How do we know what has sent a lot of emails that we can easily archive?Claude Code built a top-senders command that fetches the From header for each message and tallies by sender and domain. The Gmail API’s messages.list endpoint only returns message IDs. To get the actual headers, you need a separate messages.get call for each message. The first attempt tried to scan all 15,000 messages individually and blew through Gmail’s rate limit (250 quota units per second).
I asked Claude Code to explain what was happening. It laid out the math: 15,700 API calls at 5 quota units each, running at 4x over quota. I made the call:
don't scan all 15K, just scan the last 1000, and specify that this is going to be an estimateClaude Code then rewrote the command to sample recent messages (configurable via --sample N) and label the output as estimated. Recent senders are representative enough, and perfect data isn’t worth 15x the API cost.
Cleaning 15,000 Emails
With the CLI built out, Claude Code and I spent about 45 minutes cleaning my inbox. The workflow was a loop:
- I ask Claude Code to scan the next batch of emails
- Claude Code fetches them and categorizes into “bulk archive,” “individual archive,” and “keep”
- I approve with tweaks (“keep the daily newsletter, archive the rest”)
- Claude Code runs parallel archive commands
Each round knocked out thousands of emails. LinkedIn (2,191), Garmin (1,494), Going travel deals (1,587), Amazon (627), GitHub notifications (427). Claude Code suggested senders to archive, and I made the final call.
After seven rounds, I got impatient with the sender-by-sender approach:
can you archive anything earlier than summer 2025?One command: gmail-cli archive --search "in:inbox before:2025/06/01". 6,152 emails gone. Sometimes a time cutoff beats a careful review.
We finished with the inbox under 500. I went through the remaining messages individually, keeping personal emails, immigration documents, and a few recruiter threads worth responding to.
What I Learned
A CLI beats browser automation for any structured API. I started with Chrome DevTools MCP to scrape Gmail through a browser. A CLI that wraps the API directly is faster, more reliable, and gives the agent structured data to work with. If an API exists, a CLI is probably the better interface for your agent.
OAuth setup is easier than it looks. The Google Cloud console, consent screens, and scopes sound complicated. In practice, it took about an hour of clicking through forms. Once credentials.json is in the project, the CLI handles everything else.
Think creatively about how your agent accesses tools. Most of the features came from hitting a wall during real use and asking Claude Code to fix it. The agent doesn’t need a perfect tool upfront. It needs a starting point and the ability to extend it.
I’m not sharing the source code because that’s not the point. This post is a recipe: set up your project, have Claude Code write a plan, follow the Google Cloud setup, build the CLI, and iterate from there. Gmail CLIs already exist, but I wanted something that fits exactly how I work, and it was simple to build. Copy this blog post into your AI agent and it’ll likely figure out the rest.